


What This Solution Does
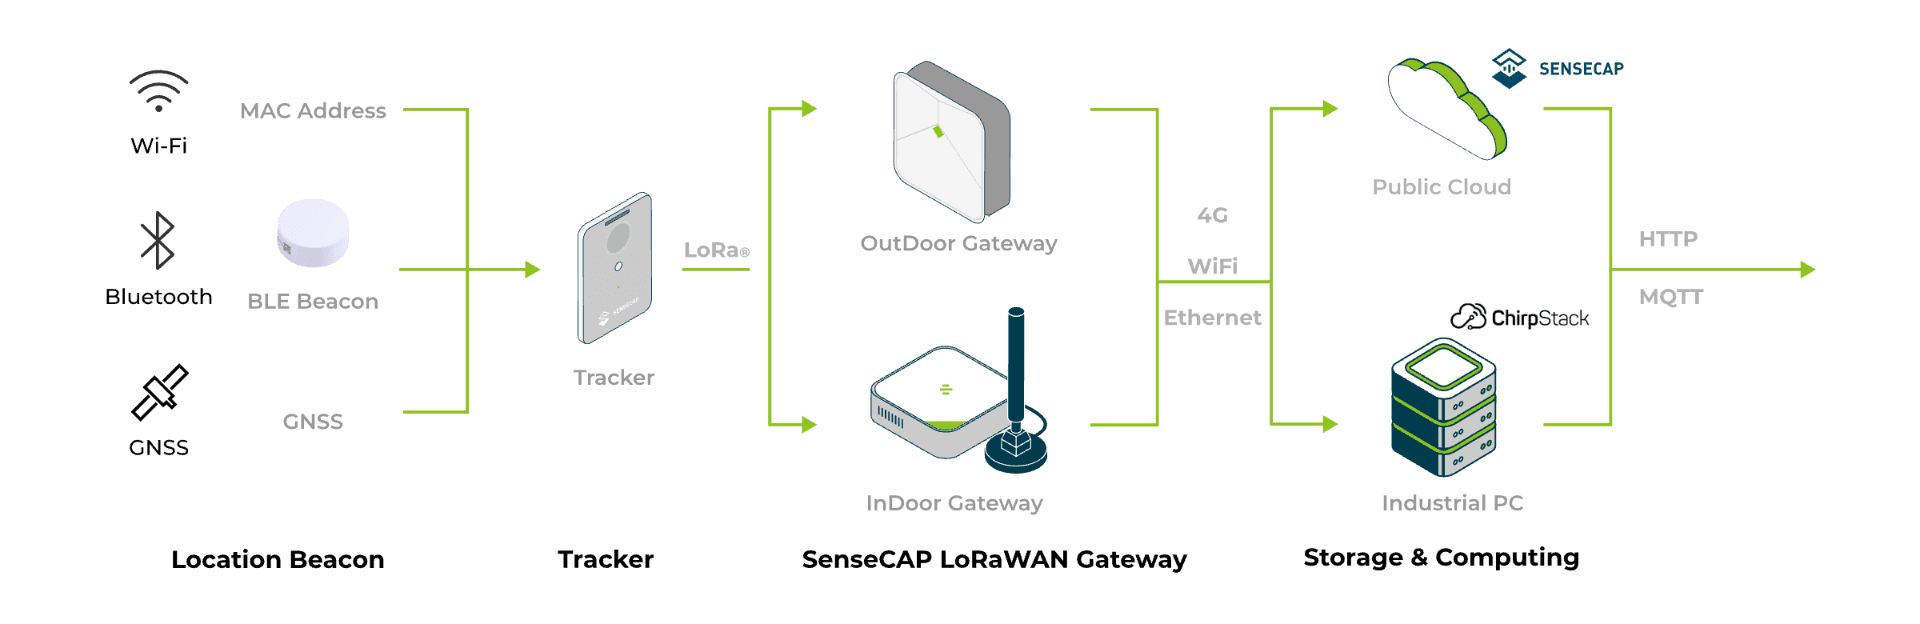
Where did that forklift go? Is the equipment still in the warehouse? Are workers at their stations? Traditional solutions are either expensive or require complex wiring. This solution uses battery-powered positioning tags and long-range wireless transmission to show you real-time locations of people and assets on your computer or phone.
Core Benefits
| Benefit | Details |
|---|---|
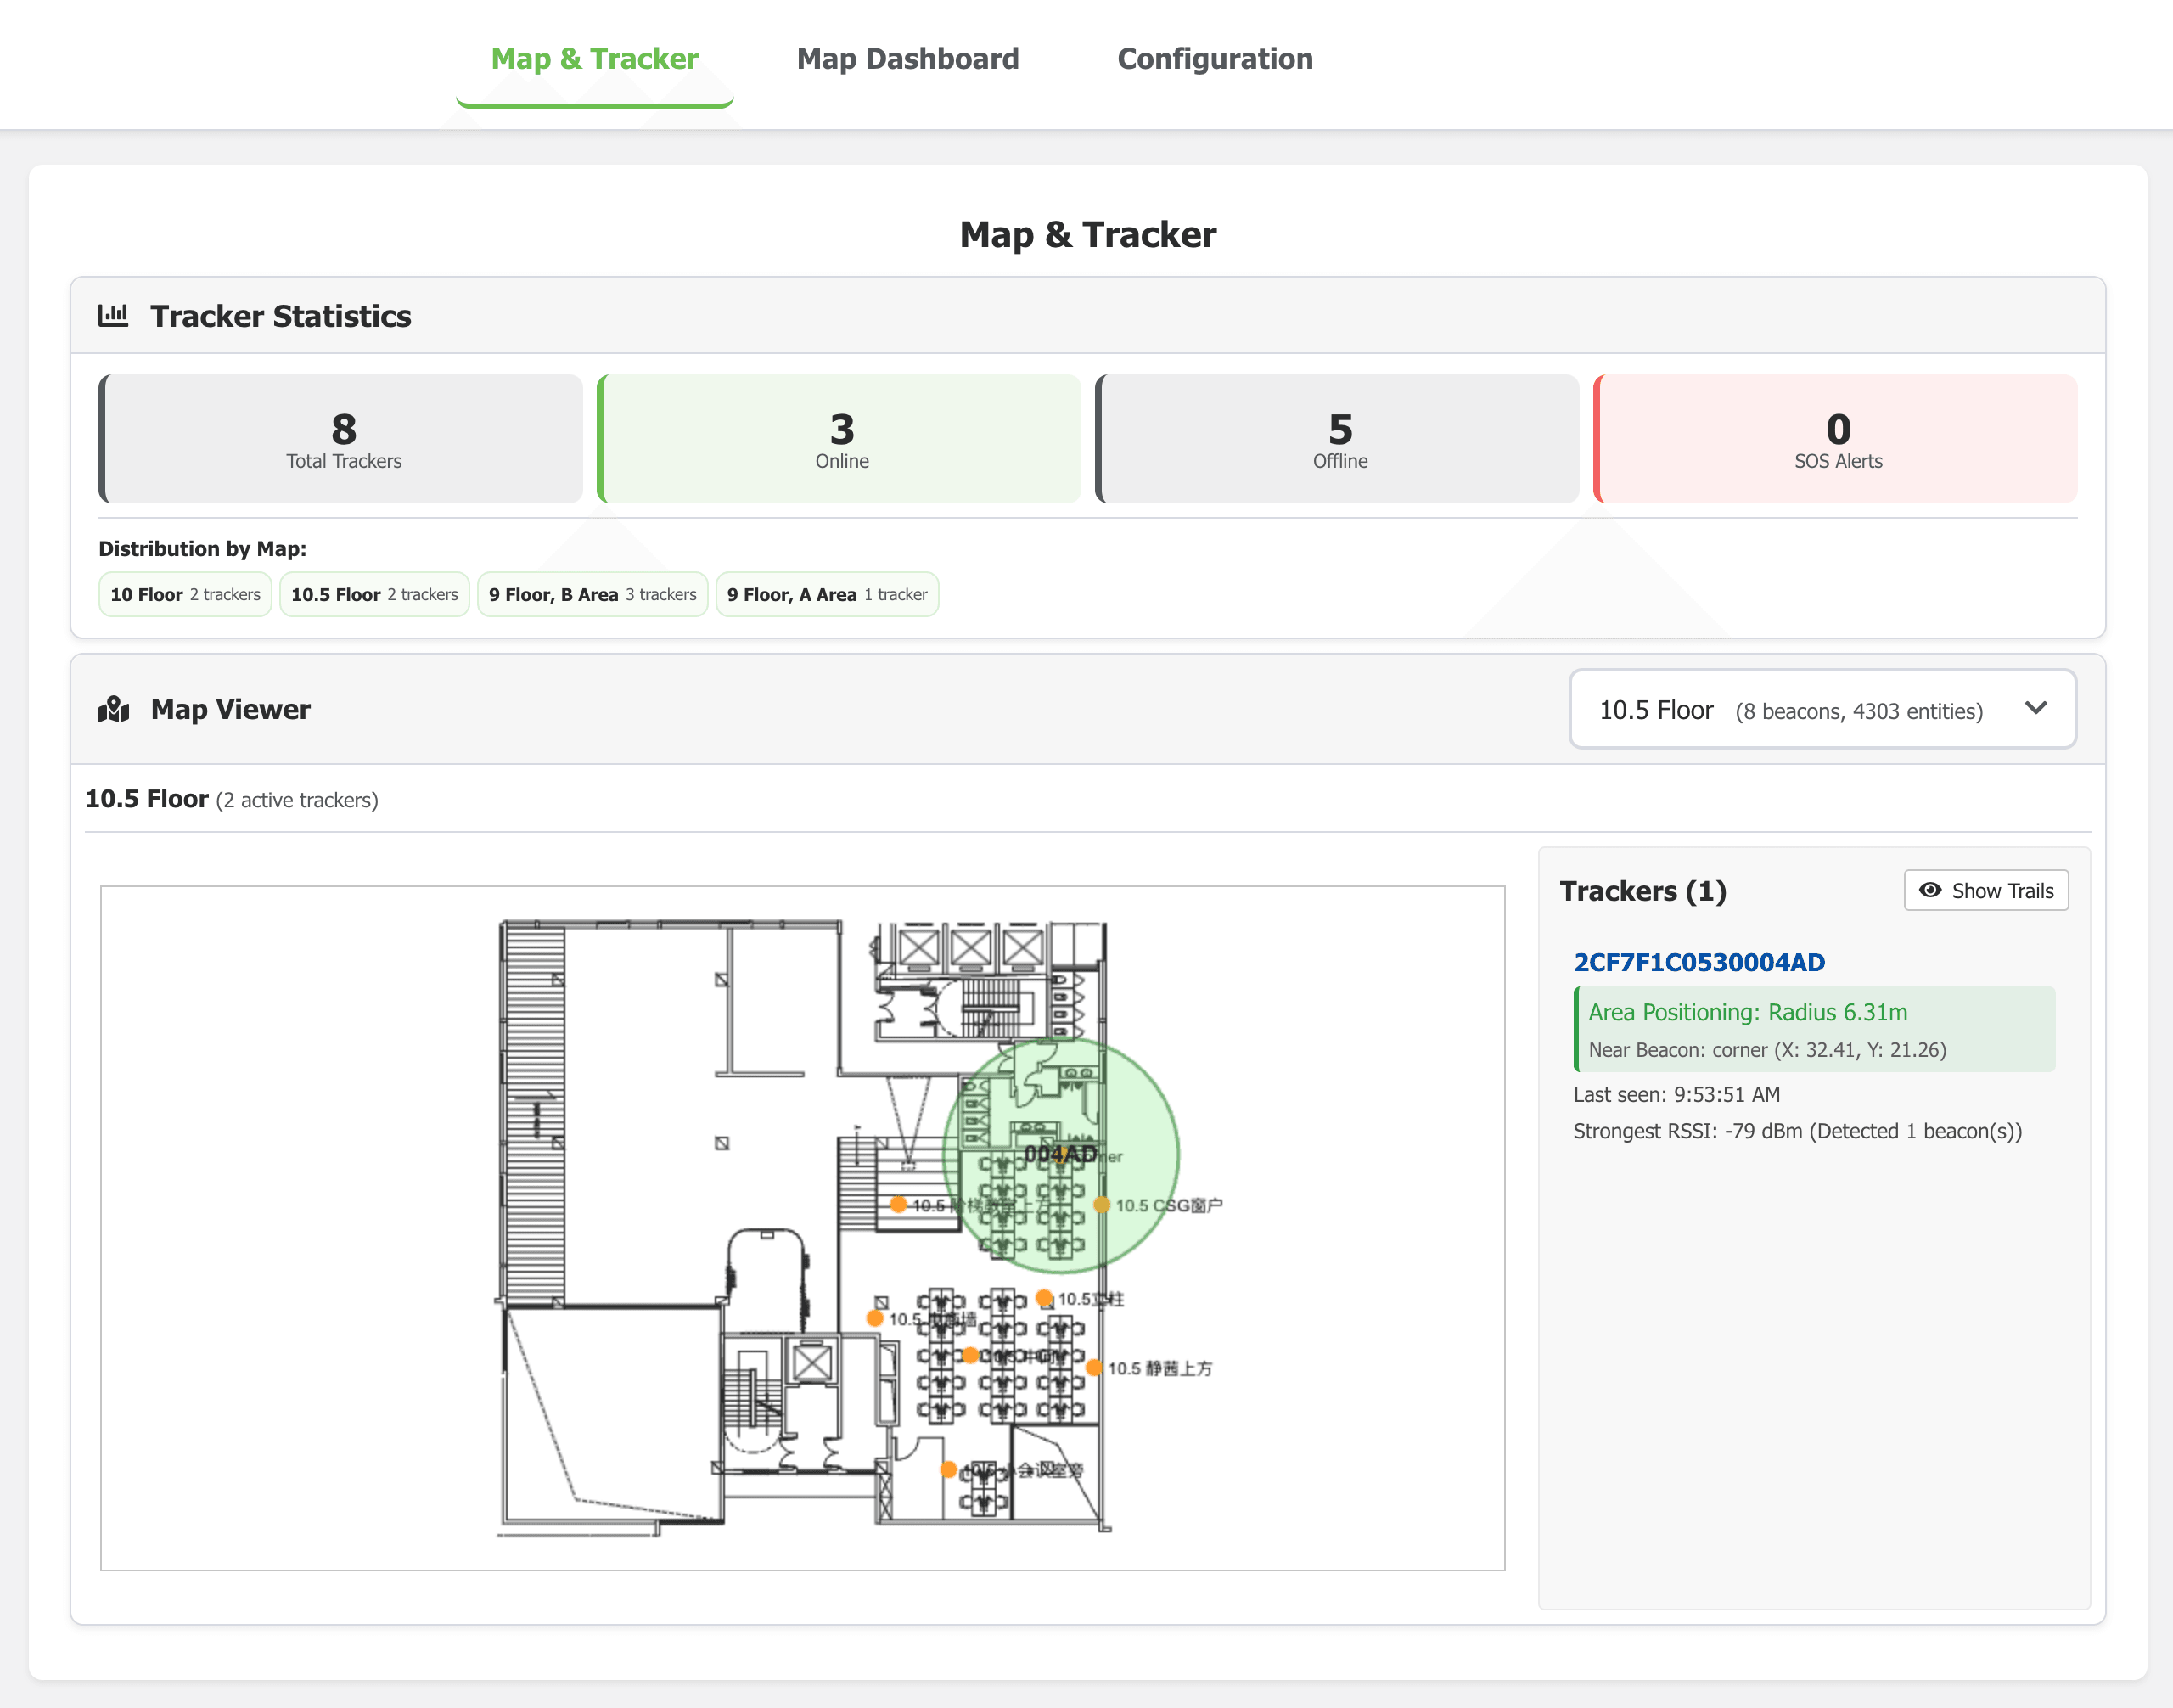
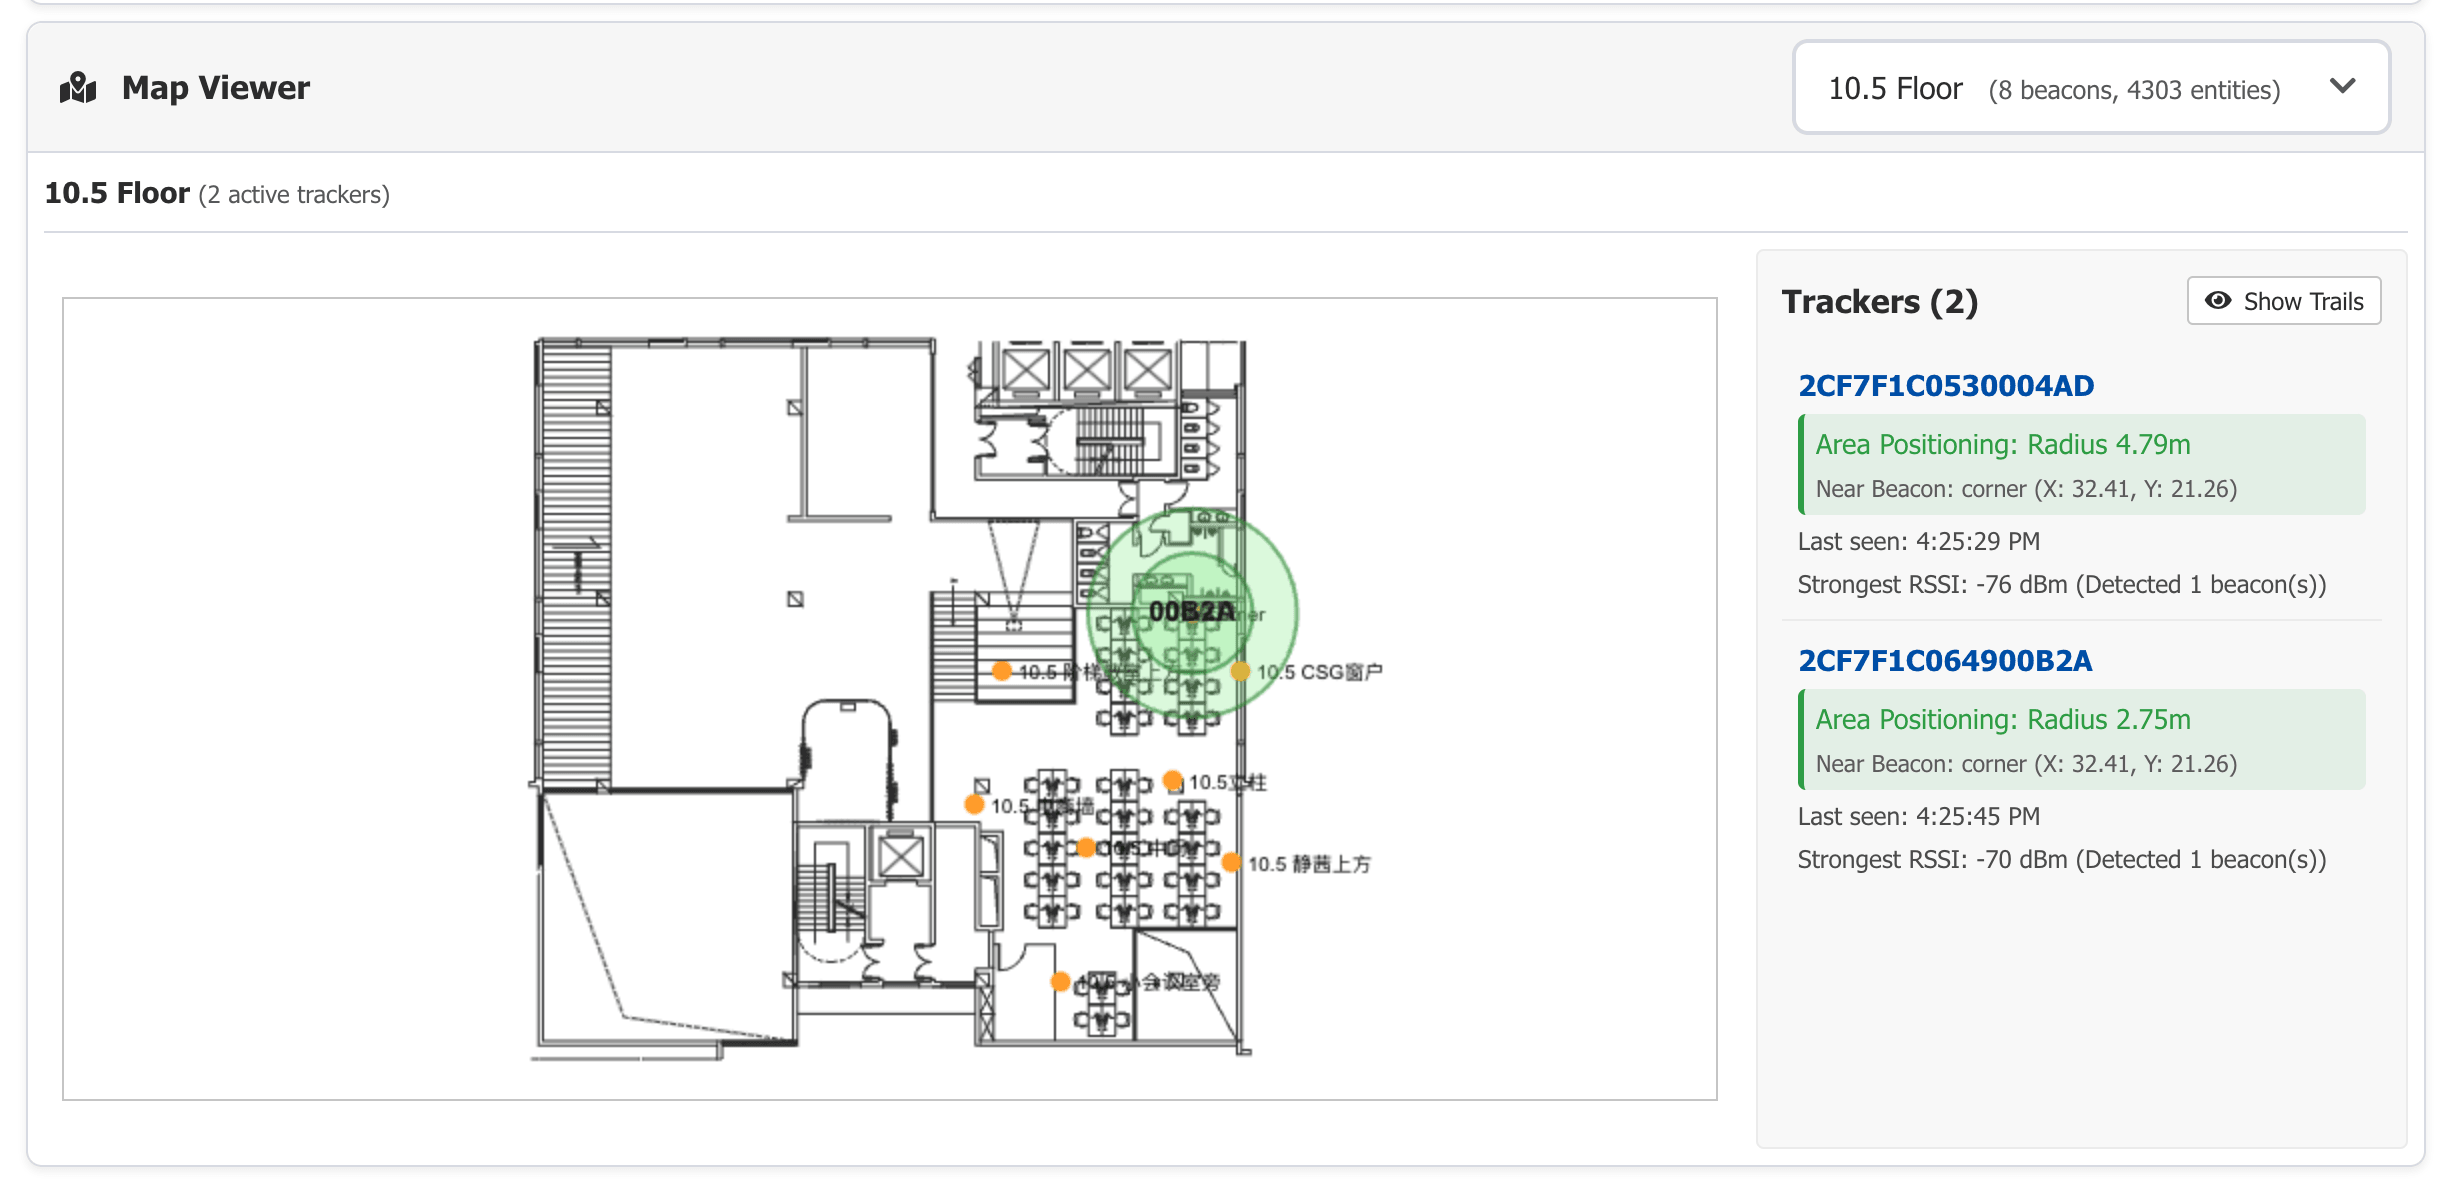
| Find things fast | Open the web dashboard, search by name, see location in seconds |
| No wiring needed | Stick positioning tags on walls, batteries last 2 years |
| Wide coverage | One gateway covers 2 km, manage your entire campus |
| Auto check-in | Automatic attendance when entering zones, no manual sign-in |
| One-button SOS | Trackers have emergency button, long press for instant alert |
Use Cases
| Scenario | How It Works |
|---|---|
| Warehouse logistics | Attach trackers to forklifts and goods, see locations on web map |
| Factory patrol | Workers carry trackers, system auto-records routes and timestamps |
| Campus safety | Students wear trackers, press SOS in emergencies, staff get instant location |
| Elderly care | Residents wear trackers, get alerts when they leave safe zones |
| Asset protection | Attach trackers to valuable equipment, get alerts if moved |
What You Need to Know
Detection Precision
- Precise positioning: 1-3 meters, requires 3+ positioning tags per zone, shows movement trajectory
- Zone-level: 1 tag per room, shows "which room" only
Installation Notes
- Mount positioning tags at 2.5-3 meter height
- Space tags 10-15 meters apart
- Add extra tags in areas with metal shelving
Battery Life
Positioning tag batteries last over 2 years, typically up to 3 years
Node Capacity
100-200 trackers can connect in the same range (depends on LoRaWAN gateway)
Output Interfaces
Open-source, integrates with third-party LoRaWAN services (ChirpStack, TTN, etc.)
Deployment Comparison
| Option | Coverage | Default Config | Best For |
|---|---|---|---|
| Starter Kit ⭐ | Up to 500 sqm | 6 beacons + 1 tracker | Small office, first-time setup |
| Standard Setup | 500-2000 sqm | 15 beacons + 3 trackers | Medium warehouse, factory floor |
| Enterprise | 2000+ sqm | 30 beacons + 10 trackers | Large campus, multi-floor facilities |